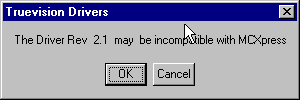


if this window does not appear, select the Organizer... option from the Tools menu.
New Project... option from the
File menu. The naming of the project is important: there will are typically a
large number of projects active in MCXpress, and we need to be able to determine the
owners for each project if we need to move or archive projects. The current naming convention
is (name) Conference, for example: (cstolte) INFOVIS 1999.
Tools->Digitize..... The digitize window will appear.
NLEPC Kinora (PC) entry that appears in the text list on the right-hande side of the web page.
There is no image for Kinora. Telect: telect -lsdi -idigibeta
-onlepc. See the capture page for
more on routing.
viewmon
for preview and playback of the video input and output. If you select Line B
as input to viewmon (the input buttons are on the front of the monitor) then MCXpress will
display the raw input and output to that monitor.
FS1 or FS2. However,
when you route through either of these transcoders, audio will not automatically follow the
video signal. You need to first route your audio signal directly to Kinora, and then route the
video signal to Kinora through the transcoders. You must route audio first - this
will not work if you route audio after video. If your clip does not have audio, disable the audio channels
by unchecking those signals in the digitize window:

record button. MCXpress will immediately start
digitizing the input to the disk. When you are done digitizing, click the stop button.
You must then immediately name your digitized video clip -- the new clip will appear named Untitled
in the list of clips that appears at the bottom of the digitize window:

File->Import->Import File(s)... and select a still image, video clip, or audio
clip that you want to import. You'll see it appear in the Project
window. You can drag it into place in the Timeline window. To make
a simple video, just import your all your pieces and drag them into
the Timeline window in the right order. If you just want straight
cuts with no fancy transitions you can just shove them all
back-to-back on the (V1) track.
In and Out markers, or you can clip it after placing it into the
Timeline (again using In and Out markers). Still images default to a duration of two minutes.
 button
in the Timeline window.
viewmon simply by setting viewmon's
input to be Line B and pressing the  button in
the timeline window.
Tools->Print to Tape... The
print to tape window will appear.

telect -lsdi -inlepc -odigibeta.
record button. MCXpress will then remotely control the deck to
write out your video to the digibeta. You can then create SVHS copies from your digital master copy.
If no video or audio appears on the tape, you may need to power off and on the Targa board - some
times it gets into a weird state, and must be rebooted.

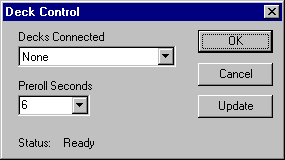
The deck control window will appear:


update button.
If it still does not appear, then make sure you properly patched the deck control in
the RS422 patch bay.
OK in the deck control window. Now when you either digitize or print to tape
it will use the deck control. If you need to manually position the tape, you will need to
turn off the remote control on the deck by pressing the remote button on the digibeta.
Return to Main Video Menu
[email protected]
Last modified: Mon Feb 28 16:19:18 PST 2000